Ready, Rugosa

Image

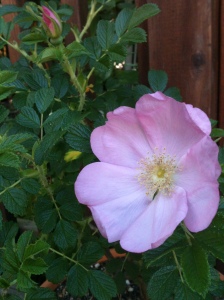
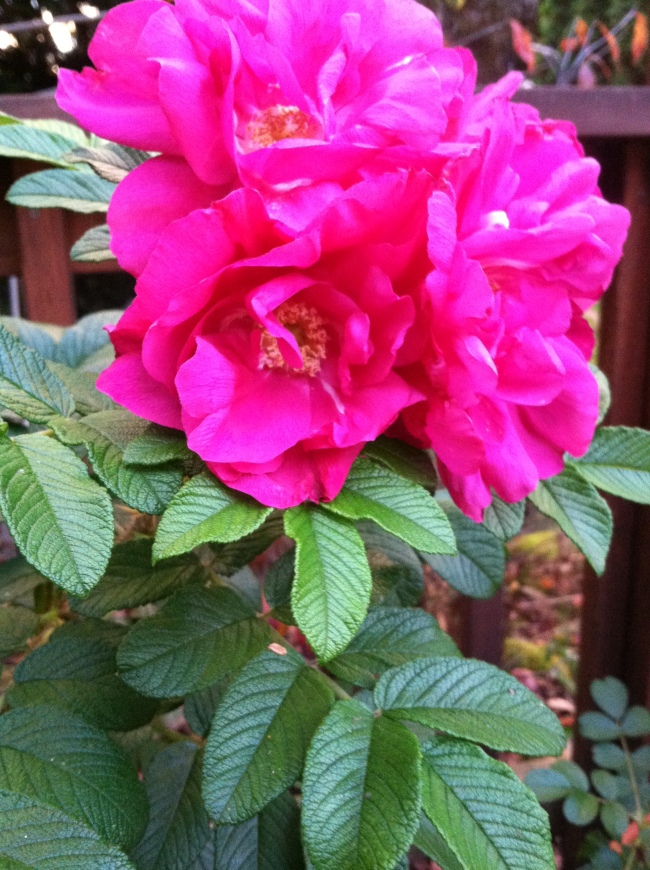
Moje Hammarberg: The actual plant is not this blinding, I swear.

I have two rugosa roses which I’m very fond of. Why? They require very little work. They have few diseases, and not only do I not need to spray them with anything, they would be damaged by spraying. This rose species tolerates a lot. The ‘rugosa’ regards their ridged leaves. Most of the flowers of the rugosas are tend to be simple single or double petaled blooms, and bear large orange hips. I have a Frau Dagmar Haustrup (sometimes ‘Hartopp’), and a Moje Hammarberg. I’ve grown the Haustrup in sunny California and in rainy Oregon with great success.

2013-05-08 15.57.56

The Frau

When most people think of roses, they are thinking of the hybrid tea roses, and then complain about how difficult roses are to grow. Ah no, I say, look at the rugosa. Then they object because the rugosa doesn’t come in orange, and they doom themselves to disappointment trying to begin growing roses with a hybrid tea (which is not to say it can’t be done, but really? All that for a stiff, low-scented bloom?).

It’s an illustration of using tools and methods suiting the skill level, and what is best suited to a situation. I don’t have a lot of time or energy to spray or debug, I like plants, but I’m not that into gardening. Half the project is preparation -this huge piece of wisdom I came by painfully, after many years of abandoned projects. I would try to sew clothes, sculpt busts, paint with watercolors without understanding darts, knowing how long to bake the Sculpey or how to lay in washes. I got a massive fail on most attempts and would give up, going back to what I did better.

I didn’t have an ‘a-ha’ moment as much as a slow realization. In my first degree (art) I took several etching classes. Before doing anything in that discipline the materials have to be prepared: the plate has to be beveled so it doesn’t ruin the blankets. The ground has to go on evenly so the lines don’t get messed up. The (expensive) paper has to be torn to the right size so as not waste any. Times have to be guaged for the acid bath or the image won’t look right. Hands must be washed or ink will get everywhere. And on and on.

After an ill-fated sewing project last year, I finally learned to make a muslin first, I found textbooks not only about darts but about making slopers too. I don’t think I’ll use Sculpey for much more than beads or buttons, but if I do, I’m getting a timer. When you get the right materials before starting, when have you the right rose, when you read the instructions first, the project is much more fun, less frustrating, and now I make fewer mistakes.

American Rose Society

Leave a comment

Filed under Life, Materials and Tools

The Great Fabric Book

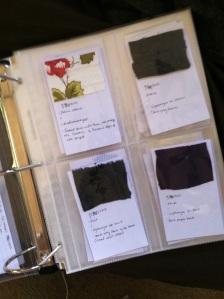
Fabric Swatches in the Binder Like most of the art supplies in my life, I have too much fabric. It currently takes up a plastic bin, and overflows into the storage space. It may not sound like a lot, but it’s like my library, it’s stuck in an awkward place and there is a lot I’m never going to get to.

Which is why my swatch book came into being. It ‘s not much more than clips of material a couple inches wide stapled to a note card. I wrote as much information on the card (front and back) as I could think of. I included the composition (I have a lot of cottons), the weave, the date I entered it, and a short descriptions (for all those large patterned fabrics especially). Some of this information I had to to straight-up guess.

On the back I wrote how much I had of each (broke out the ruler for this one), whether it was pre-washed, where and when I’d gotten it, and then anything else that might be helpful. Some of the cloth came from old bed-sheets (good for muslins!), which had tags that told me everything I needed to know.

All of this I stuck in photo insert pages in a binder.

This project’s influence will, I hope, be two-fold: first, I need to know what is in that bin, without having to remove the contents. Second, it will help me prioritize the collection. This project promises to be tedious and time consuming. If I can’t be bothered to cut a bit off to label, I can happily get rid of it.

Leave a comment

Filed under Books, Colors and Images, Materials and Tools, To Do List

The Blue Knit Dress

2013-08-28 19.21.42

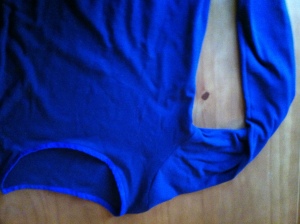
I referenced this dress in my previous post, the thing I preferred to work on. I based it on this ‘Summer Shift Dress’ tutorial.

The tutorial basically instructs you to take a shirt that you like, make a pattern out of that and lengthen and widen to make a dress.

Something not mentioned in the instructions: making a pattern is not as easy as Ms. Barlow makes it seem.

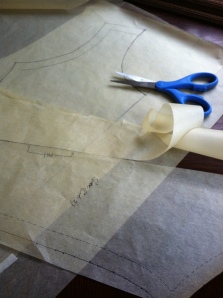
2013-07-28 19.12.31I have a roll of tracing paper (sold as ‘sketch tracing paper’ in some places) and a fine Sharpie which I used to trace the shirt. Then I removed the shirt, and traced the pattern again, until the pieces lined up with straight lines.  I was really happy I’d reviewed  “How to Make a Pattern from an Original Garment” tutorial from Sense and Sensibility Patterns. I kept that article in mind when I was tracing the original shirt.

2013-08-17 18.39.06

It is almost that easy – there are (not counting the hem/trim) two seams. The neckline I lined with blue bias tape, and the hems I made by folding (two creases) and sewing about 2 inches of material. I made a long sleeved version (like the shirt I took it from) from a double knit (more folds) and store bought bias tape. It’s a rather thick, and very comfortable, so It’s my winter dress.

Leave a comment

Filed under Instructions, Links, Projects - Sewing

When to Fold? (On Giving Up)

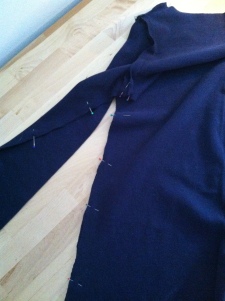
Don't Worry. This is a muslin using an old bedsheet.

Don’t Worry. This is a muslin using an old bedsheet.

There is something to be said for being stubborn. To be an artist or craftsperson, you need tenacity, enough to see you to the end of a project. At some point (about the end of the second week of Nanowrimo) you will get discouraged. This can’t be any good you say, it’s cliche’d and badly made. You might push through, and your tenacity will have paid off.

Or not. In episode #12 of  Jason Brubaker’s Making Comics Podcast  (he also does the comic reMIND) they discussed knowing when it’s time to quit. Which got me thinking about Heinlein’s second rule of writing (you must finish what you start).

I started this jacket for a temp assignment interview, when I realized I didn’t have a suit. I had a pattern for a short jacket, and a skirt. I also had about three days before the interview. I knew from the start something extremely tailored would never work, because it’s impossible to make something professional looking in three days without any experience. I tried out the pattern before I bought any ‘real’ fabric luckily, and I knew by the middle of the second day this wasn’t going like I’d hoped. The project was abandoned and I bought something which worked (and got the assignment). Now there is no reason for me to finish the project. I don’t regret it — it will never be what I initially envisioned. Instead, I can focus my energy on to my navy blue knit dress.

There is tenacity and then there is trying to get a dead horse to run. When do you cut your losses and put a project out of it’s misery?  Knowing this is like knowing when something is done. It’s a matter of experience and a little luck (I had a printmaking teacher who would say you would have to lose something three times before you found it).

Heinlein’s Rules (for reference).

2 Comments

Filed under Follow-Up, Life

The Red Notebook — Making a Cheap Notebook

This sort of goes with my last post.

After I had finished covering the Moleskine notebooks, I decided a needed a cheaper version. Here is the cheapest sturdiest book I could come up with.

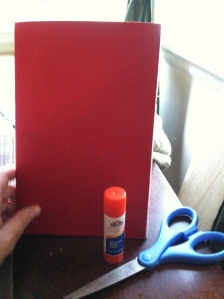
It's sort of plain, but it's the front cover.

It’s sort of plain, but it’s the front cover.

(FYI I’m editing this ’cause I finally retrieved the notebook from work… it’s still a bit rough, use your judgement with the measurements etc.)

Materials:

  • 8.5 by 11″ Copy paper, about 20 sheets
  • heavy thread
  • beesewax
  • thick needle (pointy, so not a tapestry needle)
  • A sheet of cardstock or a paper folder, bigger than 8.5 by 11″

And:

  • Glue (Elmer’s quick drying glue- stick is my favorite)
  • pen
  • ruler
  • Binder clips or bulldog clips
  • Thick folded towel (A couple of folded dishtowels work)

Carefully square up the paper and fold it in half. It’s going to bulge at the edge. Later you can cut it down with an X-acto knife if you want.

Clip the paper together with the binder clips to make sure it doesn’t slide around.

Hold the ruler against the interior crease and mark the center. Make 16 dots about 1 cm apart starting 1/2 cm from either side of the center mark  (I know — I’m mixing measuring systems!).

Put a thick folded towel or stiff foam on the tabletop and use the needle to a poke a hole at each of the dots. This is ideally done from the outside of the fold (where it forms a mountain) but is easier (and probably safer)  to position the needle in the valley of the fold. It will be somewhat difficult to punch through all that paper, but concentrate, be patient and don’t hurt yourself. If you have an awl, now would be a good time to use it.

Wax the thread by drawing through the beeswax.

Thread the needle, and tie the other end of the thread around the had of the book (through the first hole). Sew along the crease in and out of the holes you made. Loop it over the other end and back stitch through the holes, so it looks like the thread is continuous. Gently pull the thread snug. Don’t pull so hard you rip the paper, though. Tie it off the to trailing ends of the original knot.

You can remove the clip(s) now. Press on the signature so it lays flattish.

Lay the sewn paper on the cardstock. trace around it, then flip it over on it’s “spine” so it is laying next to the square you just traced. Trace it again, so it shares the spine side with the original rectangle. This is where you will glue. Add about 2 cm to each side of the large rectangle. Cut it out, then cut the corners off diagonally to the level of the original rectangle (this reduces bulk when you fold the corners over in the next step)

Carefully make some pre-folds on the originally drawn triangle. Check to make sure everything fits by placing the signature block in the folds. take the opportunity to bend the cardstock over the signature. This makes the spine. Rub glue all over the interior surface within the original rectangle of the cardstock, make sure the get the corners. Carefully line up the last page signature block and rub it down. Let the glue set before flipping the thing over and doing the other cover.

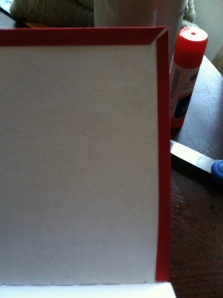
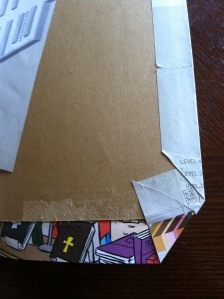
Carefully fold the flaps over the page and glue:

2013-07-21 19.22.27

At the spine, you will have to cut a small rectangle out where the cardstock can’t fold over the sewing.

Put binder clips on the edges and let them dry.

I put a pocket on the back inside cover by cutting out a rectangle and gluing it around the outer edge, but it’s a bit fiddly and entirely optional.

Leave a comment

Filed under Books, Instructions, Project - Papercrafts

The Final Resting Place of Maps and Other Ephemera (Covering a Journal)

I have spent too long away.

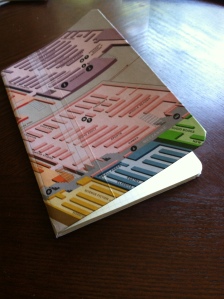
2013-07-13 12.44.55

Covered in the map. Before I added the puff paint, fern and title card.

While I was slacking off, I covered a couple journals.

I got a pack of three paper bound Moleskine notebooks. (about $18.00 at your local purveyor of fine notebooks).

I used an Elmer’s quick drying permanent glue stick. It works better than the all-purpose glue stick.

Before gluing anything, I removed the little pocket in the back before gluing on the cover.

My collage materials:

  • The Sticker that came with the notebooks,
  • Gold puff-paint
  • A blank artists trading card for the title
  • A map from Powell’s Books (They are in color and fold out).
  • A sheet of scrap-booking paper with ferns on it (I punched up the colors with some colored pencils).

I laid out the notebook and traced out the covers. I added about 1/2 inch on three sides before cutting. I glued it one cover at a time folded in the sides and corners:

2013-07-13 12.31.58

The corners.At the spines, I clipped off the bit that couldn’t be folded over.

After I’d finished with the cover, I clipped off about 1/2 cm off the very first and last page and gluing them to hide the edges of the covering material. I glued the pocket piece back on.

Leave a comment

Filed under Books, Colors and Images, Instructions, Materials and Tools, Project - Papercrafts

Tiny Almond-Apricot Bonbons

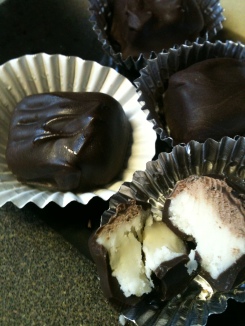
2013-05-31 20.09.14When I was a child, I had a cookbook published by Nitty Gritty books, Yum, I Eat It! (I think) that had a recipe for “No-Cook Candy”. All I remembered was that it had a lot of confectioner’s sugar in it. Searching for that led me to this recipe at cooks.com. I substituted honey for the corn syrup.

The first time, I made the recipe mostly as it’s written.

And then I got carried away.

Since I live around the corner from a craft store, I hiked over there and got some candy coating to melt in the microwave. My sister gave me some ginger flavored sugar, so I used that instead of sprinkles. I chilled the candy in a roughly rectangular slab wrapped in plastic wrap. When I was ready to coat it, I rolled half of the pieces in the sugar. Then I coated according to the instructions on the package. Crunchyness aside, I thought they were a bit bland.

So–

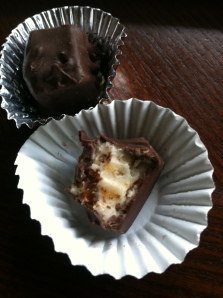
Enter the dried apricots and almond extract. Because I have those things lying about.Apricot Bonbon

In addition to the ingredients (using honey again), I chopped up 4 dried Turkish apricots (the brown kind, I found them in the bulk bins) very fine. Instead of the 1/2 tsp vanilla, I substituted 3/8 vanilla and 1/8 almond extract. You might have to eyeball it with the 1/4 tsp measure. These went in before the confectioners sugar.  This made a slightly wetter dough that previous, so I added confectioner’s sugar until it was the right consistency. I chilled for a couple hours, then I melted the chocolate coating and dipped each square. I left out the sprinkles/granulated sugar. I would recommend getting better chocolate than I did. It would make a huge difference.

The original recipe is a blank slate to add dried fruit nuts, extracts or other stuff. I would love to hear from people who have experimented with this recipe in the comments.

Leave a comment

Filed under Instructions, Links, Projects - Food, Uncategorized

Learning from Rough Drafts

I regret not having posted for the last two weeks, so I will leave you with this delightful site:

Living Lines Library

I particularly like looking at the production art. Sometimes the end product, while spectacular, is a bit too slick to really get a good feel for the work that went into it’s creation. And sometimes the rough lines are more lively.

Leave a comment

Filed under Colors and Images, Inspiration, Links

White Space (Using It): Clover by Clamp

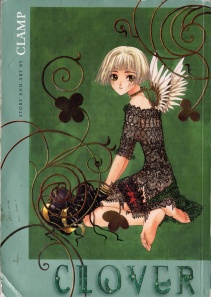
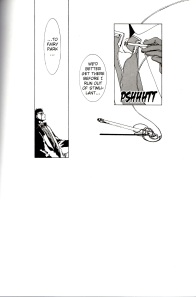
(Clamp) CloverI wanted to point out Clover because reading  this manga was a revelation.  It’s about a girl with psychic (or magic) abilities. She is the most powerful of the “clovers” so she’s locked up in what looks like an arboretum without outside contact. An ex-soldier is assigned to her. It turns out that the girl knew his deceased girlfriend. And that summary does not do it justice at all.  I’m told it wasn’t finished, which makes sense. It lacks a wrap up at the end.

The art style is an antidote to the idea that there has to  be an explosion on every page. Each page in Clover has a few panels, and/ or perhaps a couple balloons of dialog and/ or one of the motifs (clover, baroque wings etc.) and not much else. Given the isolation of the main character, the layout seems fitting.

Sometimes the space is black or toned, or has a pattern, but the concept is the same. It’s like background music in a movie or TV show. It provides an emotional backdrop. The blank space can also give the eye a space to rest and let the impact of the words/ images sink in. Clover01

This is a not an unusual amount of white space on a page:

Going with this less-is-more, I have tried to absorb this aesthetic. Lots of action and detail doesn’t’ have to be crammed into each page (though sometimes individual panels are quite detailed).


Leave a comment

Filed under Books, Colors and Images, Inspiration

Delicious Rhubarb

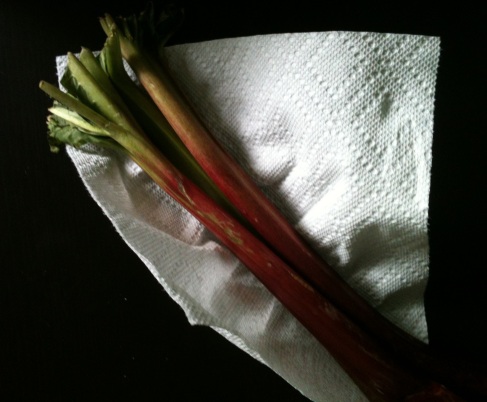
ImageThis is sort of an addendum to last week’s  post.

I love rhubarb.  It has an ‘H’ as the second letter. It requires sugar to eat and super easy to cook. It is is sweet-tart with a delicate flavor.  The stuff sold in stores is usually red, but it can be red or green (or pinkish, or speckled). Technically, it’s a vegetable, but if Wikipedia is to be believed, it’s classified as a fruit in the United States.
When buying, look for firm, thin stalks.

To cook:
Cut any leaf matter off the top. The leaves contain much more oxalic acid than the stalks so do this before you do anything else. Trim the bottoms too.
Chop stalks into thick slices: about a centimeter long.
Put the rhubarb in a saucepan with sugar to taste. (or another sweetener, I guess, I’ve never tried it with anything but granulated sugar) Use several tablespoons of sugar. I used four tablespoons for two thick stalks. Rhubarb is pretty tart and largely unpalatable without sweetener, so omit this at your own risk. If you don’t want to add sugar, strawberries are often added as a sweetener.

DO NOT add water.
Cover and cook on medium low heat until the rhubarb is uniformly soft and a syrup is bubbling up. The ‘stew’ is probably going to be pinkish.
Eat over ice cream, with cookies or tea, or just by itself.

Tasty!

Other sources besides my experience:

The Rhubarb Compendium
Wikipedia: Rhubarb
Martha Stewart (Includes recipes!)

Leave a comment

Filed under Instructions, Projects - Food, Uncategorized